Blog
Optimizing CO2 Laser Settings for Better Cutting Results
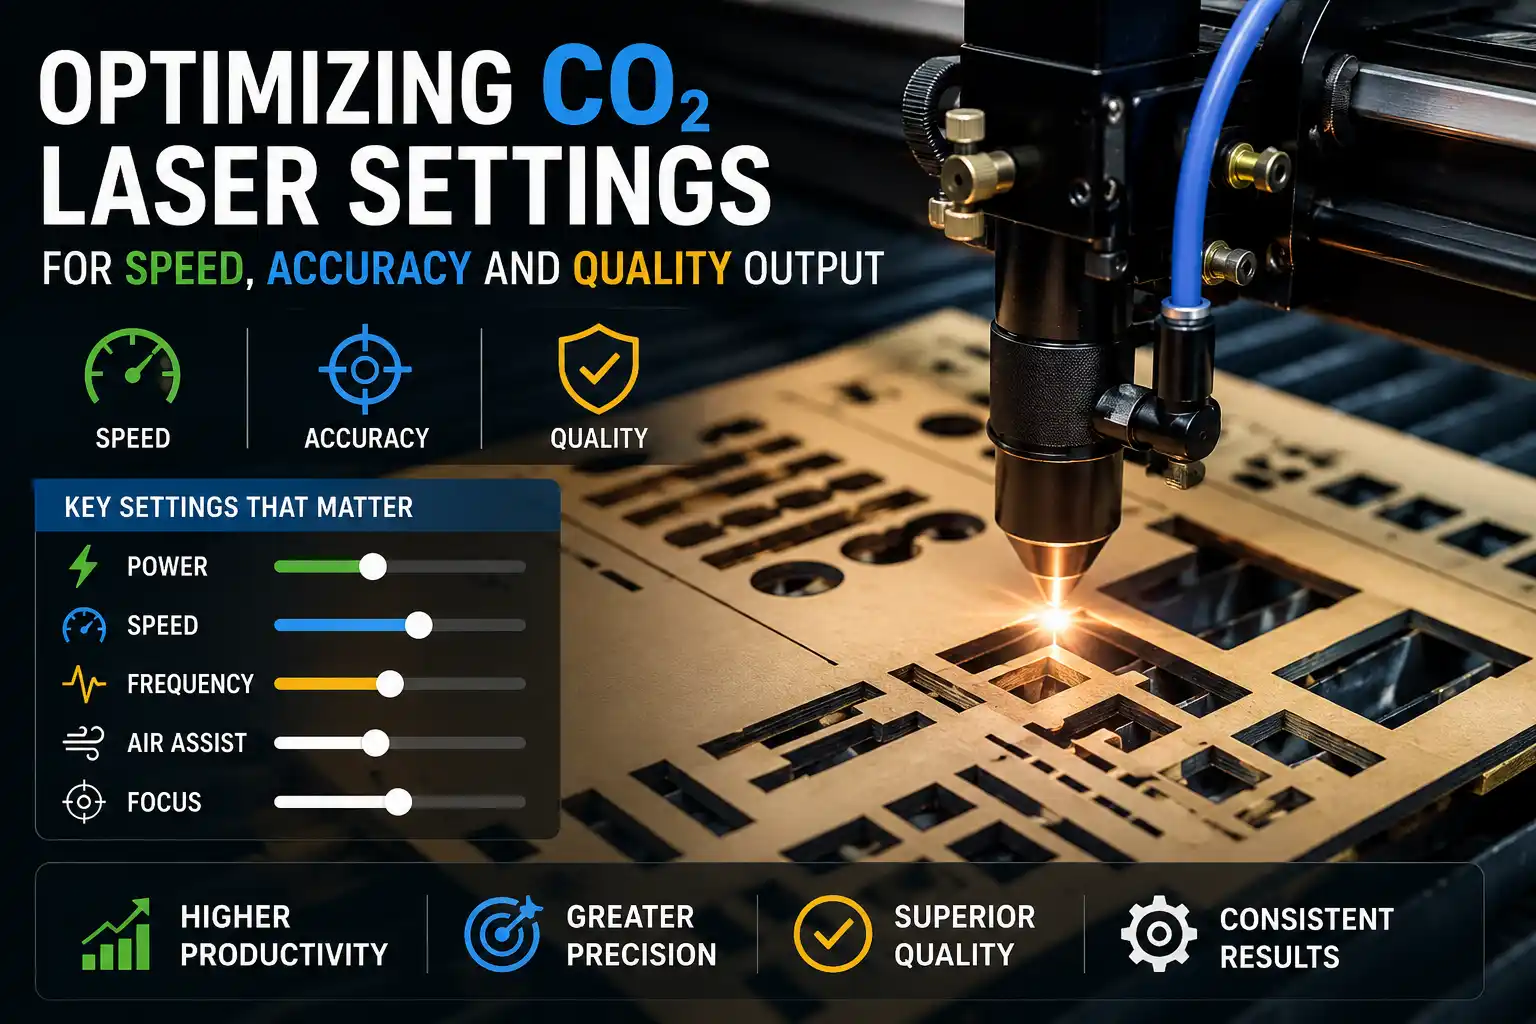
Table of Contents
Getting clean, accurate cuts from a CO₂ laser is rarely about raw power. The operators who get the best results are the ones who understand how a handful of settings interact and how to adjust them for each job. This guide walks through optimizing CO₂ laser settings for better cutting results — covering the core parameters, how to balance speed against quality, material-specific starting points, the mistakes that quietly ruin output, and how machine condition ties it all together. It is written for working sign shops and fabricators who want faster throughput without sacrificing edge quality.
Quick Answer: How to Optimize CO₂ Laser Settings for Better Results?
Optimizing CO₂ laser settings means balancing power, speed, and frequency for each material rather than chasing a single “best” number. Use the lowest power and highest speed that still cut cleanly in one pass, set frequency to suit the material, keep air assist and focus dialed in, and always confirm settings with a small test cut before a production run.
Understanding the Key CO₂ Laser Settings That Affect Performance
Five settings do most of the work in any CO₂ laser cutting or engraving job. Learn what each one does on its own before trying to balance them together.
Laser Power Settings
Power controls how much energy reaches the material. Higher power cuts thicker stock and cuts faster, but too much power burns edges, widens the kerf, and leaves charring or melted residue. The goal is the lowest power that reliably cuts through in a single pass. On most CO₂ systems, power is set as a percentage of the tube’s rated wattage, so a setting that works on a 100W machine will not transfer directly to a 60W or 150W tube.
Cutting and Engraving Speed
Speed is how fast the head moves along the path. Slower speeds deliver more energy per unit of length — deeper cuts but more heat, more burn, and lower throughput. Faster speeds reduce heat and increase output but risk incomplete cuts. Speed and power are the two settings you adjust together most often: raising one usually means rebalancing the other.
Frequency (Pulse Rate)
Frequency (PPI or Hz) sets how many laser pulses fire per unit of distance. Higher frequencies put more pulses closer together, producing smoother edges — ideal for acrylic, where it helps create a polished, flame-like finish. Lower frequencies space pulses out, which reduces heat buildup and helps prevent charring on heat-sensitive materials like wood and some plastics.
Air Assist and Gas Flow
Air assist blows a steady stream of air (or another gas) at the cut point to clear smoke, debris, and flame. Good air assist produces cleaner edges, protects the focusing lens, and reduces fire risk. Too little air leaves soot and scorching; excessive pressure can disturb lightweight materials. Tuning air flow to the material is an easy win that many operators overlook.
Focus Position and Focal Length
The focal point is where the beam is narrowest and most intense. Correct focus position is critical: for cutting, the focal point is usually set at or slightly below the material surface so energy concentrates through the thickness; for engraving, it sits at the surface. A focus that drifts even a millimeter widens the beam at the material, slowing cuts and roughening edges. Re-check focus whenever you change material thickness.
How Speed, Power, and Frequency Work Together
Individually these settings are simple; the skill is balancing them. Think of power and speed as a ratio — the energy delivered per unit of length — with frequency and air assist refining the edge.
Finding the Right Balance Between Speed and Quality
Decide the priority for the job first. For a high-volume run of simple shapes, push speed up and raise power just enough to keep clean through-cuts. For showpiece signage where edge quality matters most, slow down slightly and lower power to reduce heat. A reliable method: start from a known setting for the material, run a small test cut, then change only one variable at a time — usually speed — until you find the fastest setting that still cuts cleanly.
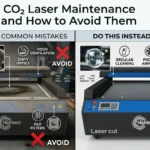
Avoiding Burn Marks and Excessive Heat
Burn marks, yellowing, and soot are almost always signs of too much heat: power too high, speed too low, or weak air assist. Reduce power or increase speed in small steps, confirm air assist is strong and aimed at the cut, and for wood lower the frequency. Masking or appling a protective film to delicate surfaces also limits surface scorching.
Preventing Incomplete Cuts and Poor Edge Quality
If the laser does not cut all the way through, the usual causes are speed too high, power too low, an incorrect focus position, or dirty/aging optics. Re-check focus for the current thickness, clean the lens and mirrors, then drop speed or raise power slightly. A single clean pass almost always beats multiple passes, which can misalign and widen the kerf.
Recommended CO₂ Laser Settings for Different Materials
Every machine, tube age, and material batch is different, so treat the table below as starting points, not fixed values. Always confirm with a test cut. The settings shown are relative guidance for a typical mid-power (around 80–100W) CO₂ system.
Material | Power | Speed | Focus considerations | Common issues |
Acrylic (cast) | High | Low–medium | Focus at/just below surface; high frequency for polished edge | Cloudy edges if speed too high; flaming if air assist weak |
MDF | Medium–high | Low–medium | Focus at surface; strong air assist | Dark/charred edges from resin binders; smoke staining |
Wood (hardwood/ply) | Medium | Medium | Lower frequency to reduce char | Scorching, uneven cuts on knots/grain variation |
Plywood | Medium–high | Low–medium | Watch glue layers; strong air assist | Incomplete cuts at glue lines; charring between plies |
Leather / rubber | Low–medium | Medium–high | Surface focus; strong extraction | Odor, residue; over-burn on thin leather |
Plastics / sign materials | Low–medium | Medium–high | Surface focus; high air assist | Melting, warping; confirm material is laser-safe |
Read More: Best CO2 Laser Cutting Machine
Acrylic Cutting and Engraving
Acrylic is one of the best CO₂ materials. For a glossy, flame-polished cut edge, use higher power with lower speed and a high frequency so pulses blend together. Cast acrylic engraves to a frosted white; extruded acrylic cuts cleaner but engraves less crisply. Keep air assist moderate — enough to clear fumes without disturbing the melt that creates the polished edge.
Wood and MDF Applications
Wood and MDF cut well but char easily because of heat and, in MDF, resin binders. Use medium power with steady speed, lower the frequency to limit charring, and run strong air assist to clear smoke. Masking tape on the surface reduces smoke staining around engraved areas. Expect denser hardwoods and MDF to need more power than softwoods.
Plywood and Composite Materials
Plywood adds glue layers that resist the beam, so cuts that work on solid wood may stall at a glue line. Use slightly higher power or lower speed, choose laser-grade plywood where possible, and rely on strong air assist. Test each new batch — glue and core quality vary widely between suppliers.
Leather, Rubber, and Fabrics
These cut quickly at lower power and higher speed. The main challenges are odor, residue, and over-burning thin pieces, so prioritize strong fume extraction and test on offcuts. Natural leather behaves differently from bonded/synthetic types — confirm composition before cutting.
Plastic and Sign-Making Materials
Many sign substrates cut cleanly with low-to-medium power and higher speed, but material safety comes first — verify the plastic is CO₂-safe (acrylic and many engraving laminates are; PVC is not). For metal signage components, a CO₂ laser is the wrong tool: Hightech’s CO₂ range is designed for non-metals, while metal cutting is handled by fiber laser machines.
Common CO₂ Laser Setting Mistakes That Reduce Quality
Using Excessive Power
Cranking power to “be safe” is the most common mistake. Excess power widens the kerf, burns edges, increases heat distortion, and shortens tube life. Start lower and raise only as needed to achieve a clean single-pass cut.
Running at Incorrect Speeds
Too slow wastes time and over-burns; too fast leaves incomplete cuts and forces multiple passes. Find the fastest speed that still cuts cleanly, and remember that a change in power almost always requires a matching change in speed.
Ignoring Material Variations
Reusing one saved profile across every sheet ignores differences in thickness, batch, moisture, and supplier. Material varies; settings should too. A 30-second test cut on a scrap corner prevents ruined production stock.
How Hightech Industry CO₂ Laser Systems Help Achieve Consistent Results
Consistent results come from the combination of a well-built machine and ongoing support, not specifications alone. Hightech Industry Group manufactures a range of CO₂ laser cutting and engraving machines for non-metal production — from compact models such as the HT CO2-6040 to larger-format systems like the HT CO2-1390 and HT-1325 — built for stable, low-vibration operation and repeatable cut quality.
Just as important is long-term operational support. Hightech provides lifetime after-sales support, including remote installation assistance, machine setup guidance, operator training, troubleshooting, software support, and maintenance guidance. Local service and technical support may be available through Hightech branches and partners in key markets including the United States, Canada, Mexico, the UAE, India, and the United Kingdom. For international customers, support is available remotely via WhatsApp, Zoom, WeChat, email, and video calls, with on-site service arranged when required.
For a busy shop, that support translates directly into uptime: faster commissioning, quicker resolution of quality issues, and less downtime — which protects throughput and the return on the equipment investment.
Frequently Asked Questions
What are the best CO₂ laser settings for speed and cutting quality?
There is no universal best setting. Use the lowest power and highest speed that still produces a clean single-pass cut for your material and thickness, then fine-tune frequency and air assist. Always confirm with a test cut.
How do laser power and speed settings affect cutting results?
Power sets the energy delivered; speed sets how fast that energy is applied. Together they control how much heat enters the material. Too much energy burns and widens the kerf; too little leaves incomplete cuts.
How can I improve CO₂ laser cutting accuracy?
Keep the focus correct for the current thickness, clean the lens and mirrors, ensure the material lies flat, and prefer a single clean pass over multiple passes. Worn optics and drifting focus are the main accuracy killers.
What causes burn marks during CO₂ laser cutting?
Excess heat — from power set too high, speed too low, weak air assist, or too-high frequency on wood. Lower power or raise speed in small steps, strengthen air assist, and mask delicate surfaces.
How do I optimize CO₂ laser settings for acrylic?
Use higher power with lower speed and a high frequency for a polished, flame-like edge. Keep air assist moderate so it clears fumes without disturbing the melt that creates the gloss.
Why is my CO₂ laser not cutting through completely?
Usually speed too high, power too low, incorrect focus, or dirty/aging optics. Re-check focus, clean the optics, then reduce speed or raise power slightly.
Can a CO₂ laser cut metal?
CO₂ lasers are designed for non-metals such as acrylic, wood, MDF, leather, and many plastics. For cutting metal, use a fiber laser instead.
latest contents